I'm sure she'd approve
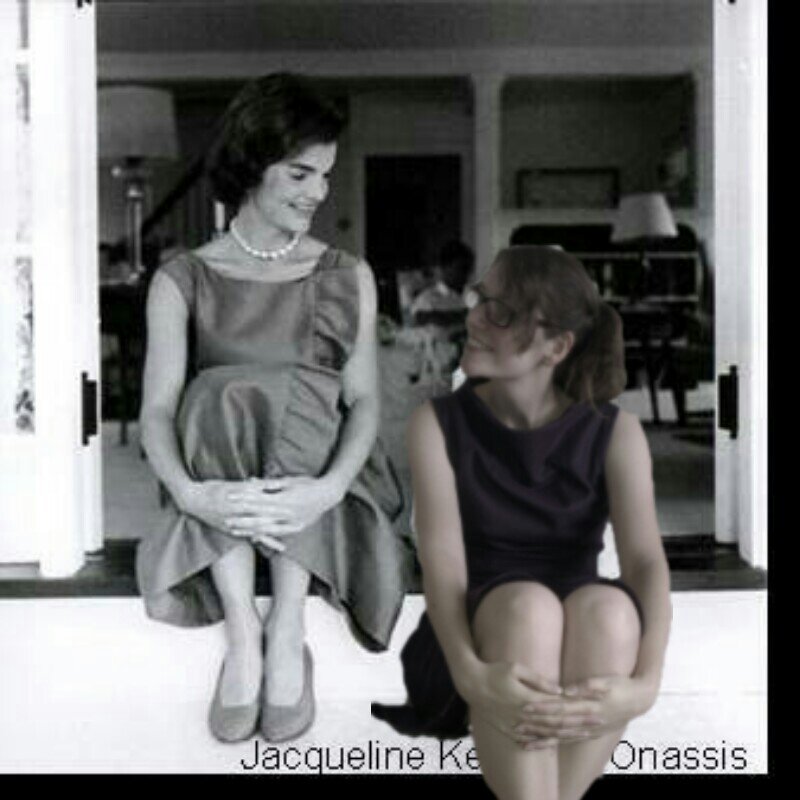
This is another of the Famous Frocks dresses, a sophisticated Jackie O inspired shift in purple. It has a lovely boat neckline and slight swish with an A line skirt. 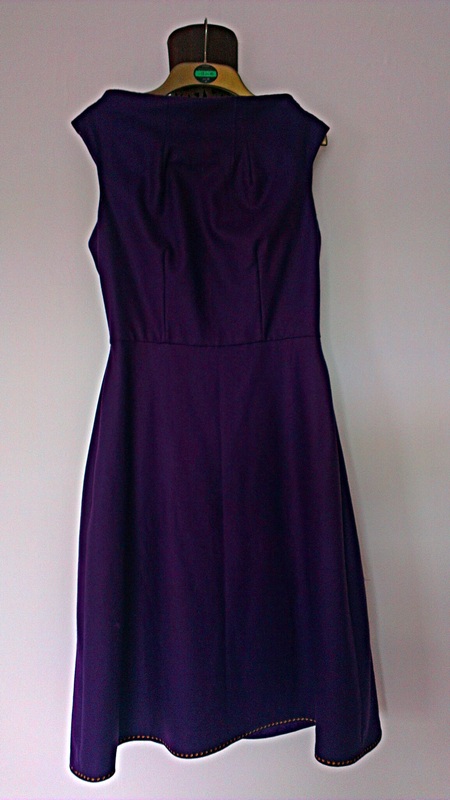
This took 1.5x1.5 m of purple felt, the same of purple lining, a 22" zip(pattern recommends 24" but they're harder to find) one spool purple thread, some gold embroidery thread and a hook and eye. 
The lining
The pattern came together relatively easily although I'm finding the top came out quite small. The suggested seam allowance is 16mm and I ended up giving it 10mm. This is a little too big so go for somewhere in between. The dress isn't lined so cut the same pattern, except for the facing out of their lining. Sew the skirt in the same manner as the main skirt and then attach it at the top wrong sides together. Sew the top lining as the fabric top and then sew it wrong sides together to the fabric at the same time as the interfacing (make sure it will end up under the interfacing!). When attaching the top to the skirt, leave the top lining free and then hand sew it over later, once the zip is attached. 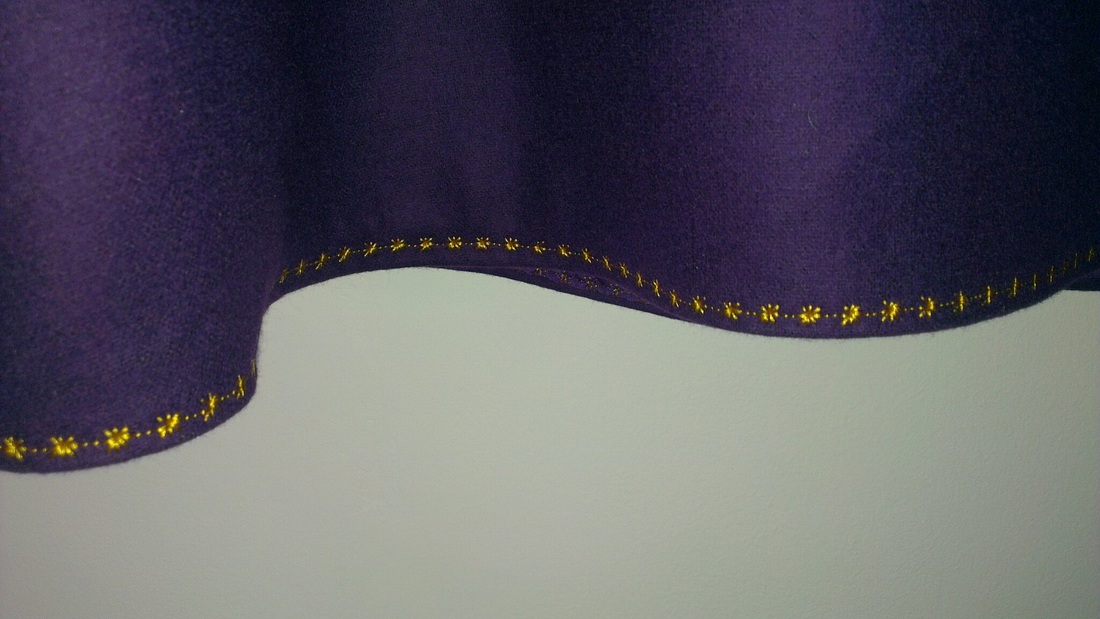
I wanted to test the embroidery capabilities of my new sewing machine so decided to embellish the edges with some gold stitching. 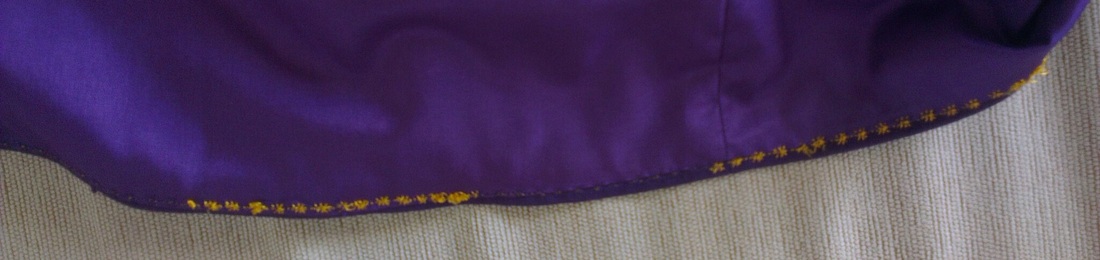
You can see the gold knots where the thread snagged
I wanted to go around the hem, sleeves and possibly collar but unfortunately the machine found the fabric too bulky. I lowered the tension as much as I could and made it around the hem but the four layers of felt at the arm holes were too much for it. 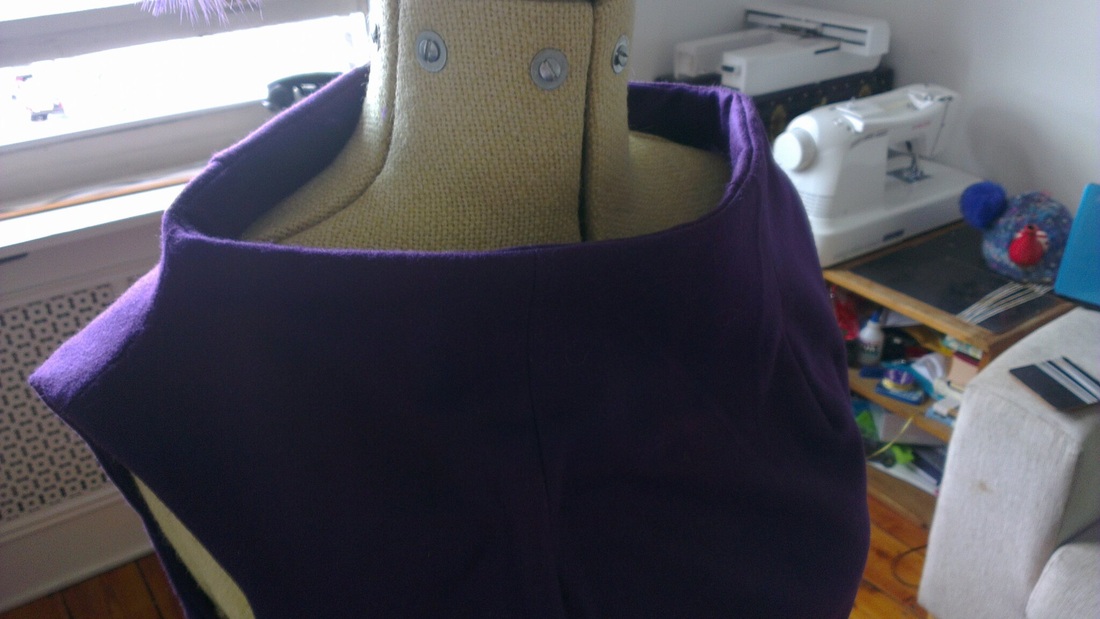
Warning to others- I have a long neck and wide shoulders and the collar neatly brushes my chin. Might want to make it shorter or make sure you stand up straight!
Overall, I'm pleased with the dress and think it will look lovely with as black leather belt around the waist, a very stylish addition to the autumn work wardrobe. 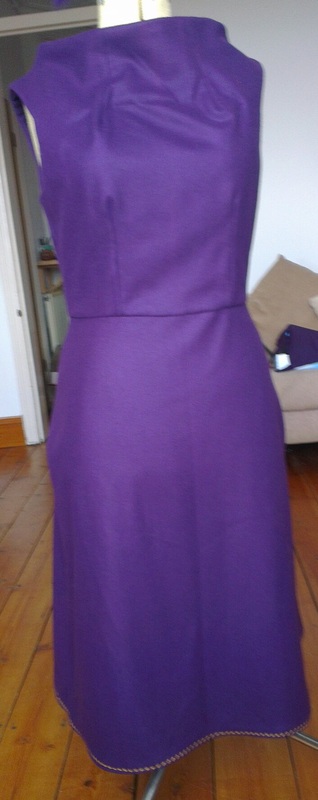
Later adjustments: I took the neckline up at the back in a triangle from the zip to the shoulder to make it fall better, 1" at the largest. I think this could be improve by using a side seam zip rather than a back Centre seam zip.
0 Comments
A few weeks ago a very generous friend gave me an amazing book called Famous Frocks which has patterns of fashion icon dresses. This is the first one I've tried. It's a swinging sixties design with circle pockets. Rather than go for the traditional four contrasting colours I used blue and black herringbone twill with a black velvet bodice. 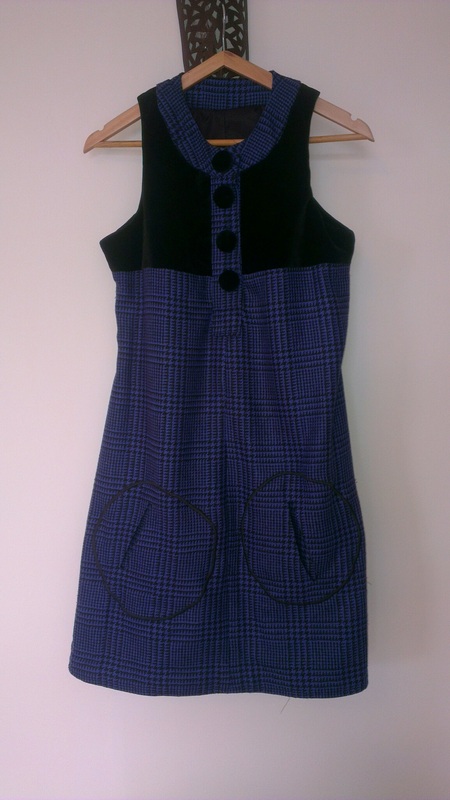
This took 1.5 x 1.5m of blue herringbone twill, an off-cut of about 1x1.5m black velvet, 1.5x1.5m black lining and four coverable buttons 29mm. 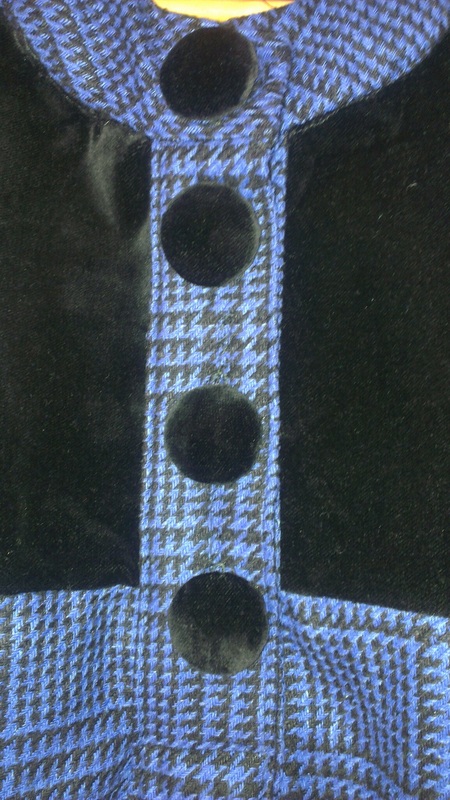
This was also my first project on the new sewing machine, which very excitingly has an automatic buttenholer so I have four beautiful, even buttons although it did have a little trouble with the thickness of the wool. 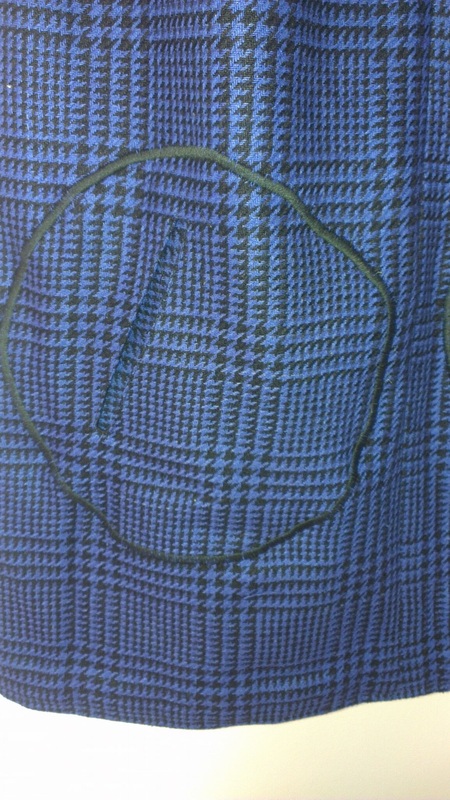
The pattern came with optional circle pockets which I thought were suitably groovy and added. I had a lot of trouble with rotating them and in the first attempt ended up with two left hand pockets! Luckily the new sewing machine is very accurate with its stitching and so you can't tell where it's been unpicked! I top stitched the edge of the pockets with a lovely satin stitch to make them stand out more (thanks again new sewing machine). 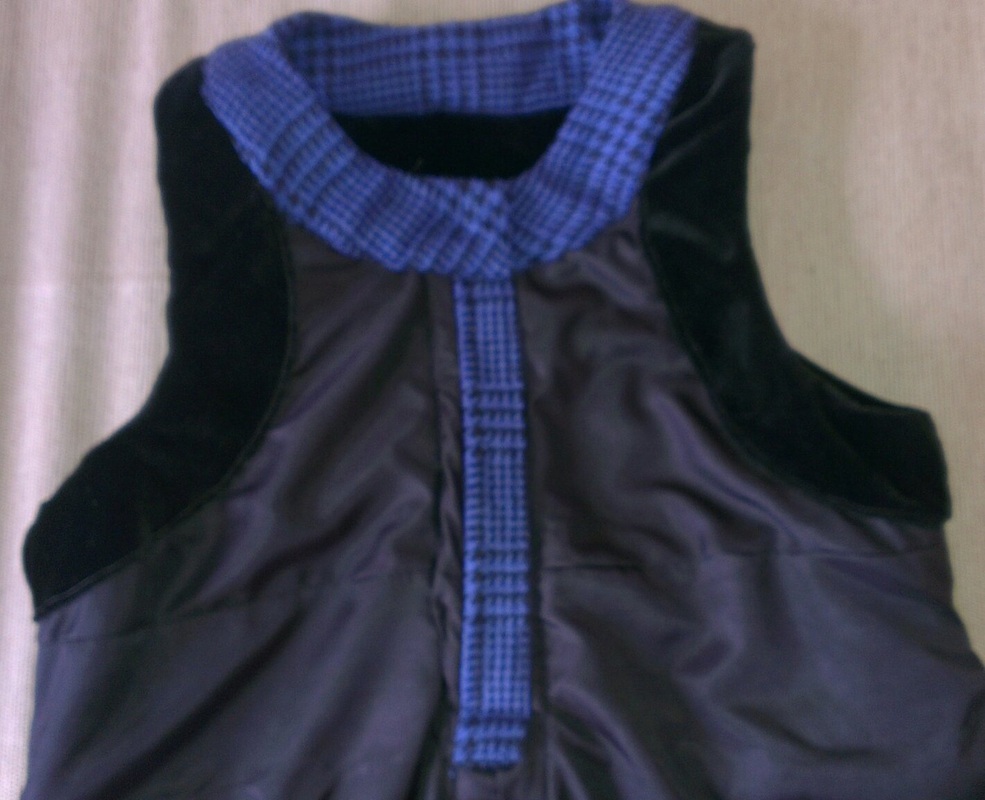
The book doesn't line any of its dresses so I cut a lining pattern out and attached it before adding the placket. I've joined the seams of the dress and lining together but left them free at the bottom so the dress swishes a bit. 
The original
Overall, I'm really pleased with the dress. The top is as little tighter than expected although the book did say it had made the top a little more fitted. This could also be because of the thick velvet but I might try the next size up next time as I had to sew the seams as small as possible! I think the herringbone is really smart and an authentic material pattern. While the velvet is gorgeous, it does add a slightly nineties child's party feel to the dress!
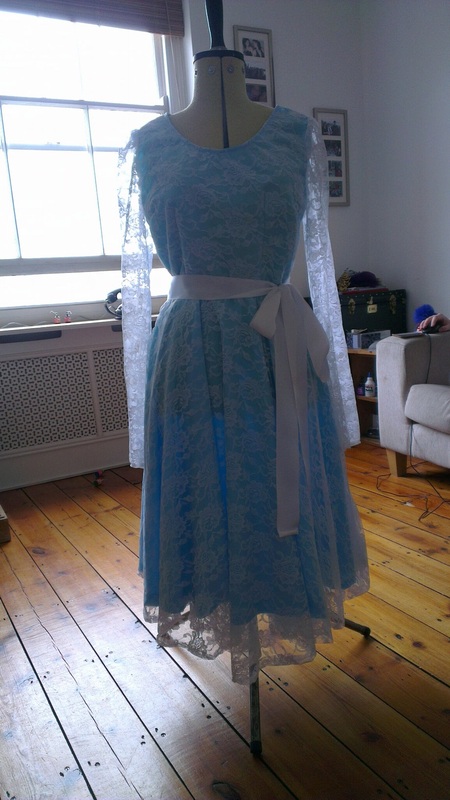
This is such a pretty dress, though I say it myself, and was very easy to make. I didn't make any changes from the pattern instructions except to make the lace a little longer than the blue underlining. Perfect for a beginner project. 
Isn't the lace pretty?
Materials needed: 3m blue cotton (Fabric Land Southampton) 3m lace (Fabric Land Southampton) 1x white 20" invisible zip (eBay) 1 reel white cotton 1x hook and eye claspI used a size 14 (usually size 12 top and size 16 bottom) and it's a little loose fitting but still flattering so I didn't take anything in. 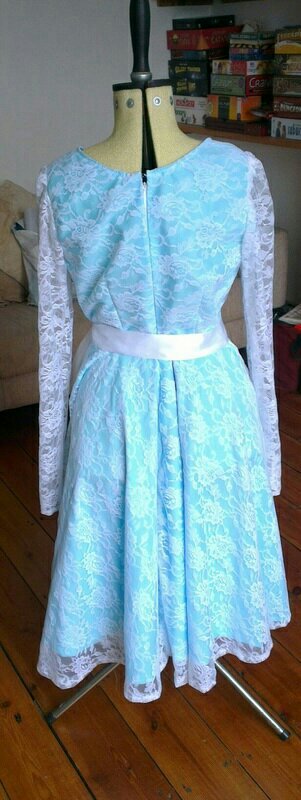
The back view and a better shot of the colour
This is a lovely smart day dress that works well with bright colors beneath the lace. It could be easily smartened up to evening or brides maid using cotton sateen, or silk under the lace and a flouncy petite coat. 
Dress F from Vogue Easy V8766
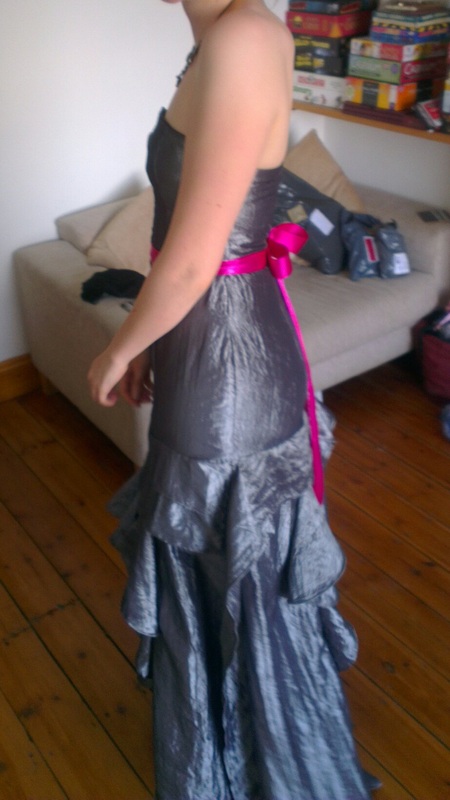
This ball gown is a combination of two patterns: V8858 C for the skirt and V8766 C for the bodice. This is the first time I've combined patterns so was quite an experiment! 7m grey taffeta 'taff medium crash 34' from my fabrics.co.UK 1m black cotton 'Lula 33 soft' from my fabrics.co.uk- fine for lining but pretty poor quality for anything else. 3m fusia 38mm ribbon from eBay 60cm plastic boning from eBay 22" invisible grey zip from eBay. 
Part One: the Bodice I added1" to the bottom of the bodice and I have a pretty short upper body so would recommend everyone do that. Next time I'll add 1" at the top too as it's a little low cut. The boning was a little fiddly as it had been rolled up for a long time. Next time I'll try to straighten it out first. I was worried that it wouldn't fit as the fabric looked very small so did narrow seams but just ended up taking them in again.Note to self: make sure the bodice fits before moving on because it's harder too adjust once the lining is on. 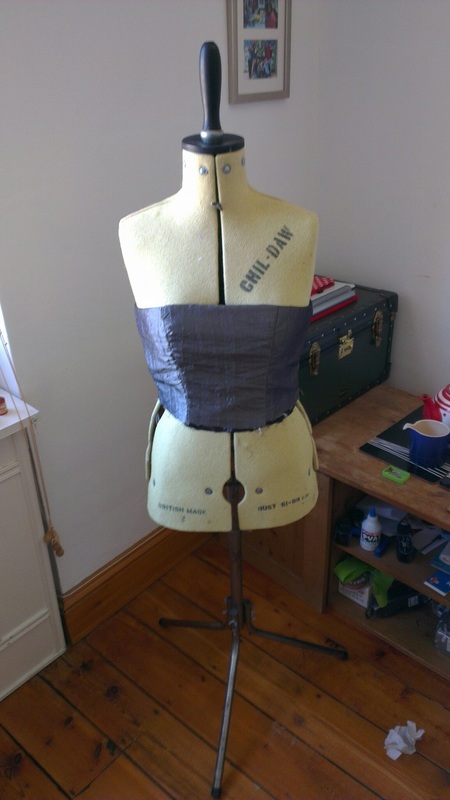
Part Two: the Upper Skirt I added 1" to the bottom of the skirt and next time would add 2". It needs to become wider at the bottom on the extra bit. I thought it didn't fit properly and undid the seams only to have to put them all back at the end. It's just the final couple of inches that need widening by about 0.5" each seam. I attached the bodice to the upper skirt and then added the invisible zip. I pressed the seam upwards and sewed the bodice lining over it. 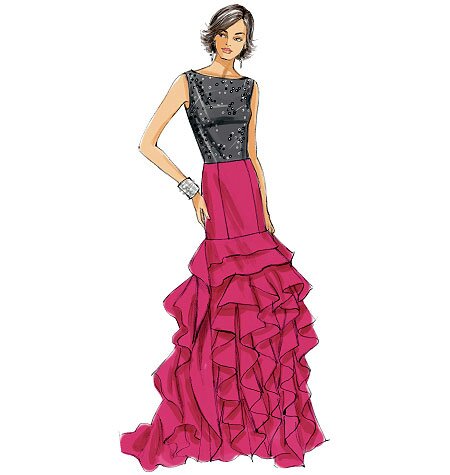
Part Three: the Lower Skirt There are a LOT of flounces on the lower skirt and it takes a lot of ironing. I added 2" to the lower skirt panels and back panels but not to the flounces. Make sure all the flounces don't reach the floor or hemming will be difficult. The suggested method of hemming the flounces was messy so I folded them over twice. I hemmed the bottom of the dress by turning it up and sewing a zig zag stitch.Take care when sewing the back as the back and back side panels are different lengths to allow for a train and it's easy to sew the wrong two together. 
Part Four: the Finishing Touches The panels of the bodice and the skirt don't line up so I added a pink ribbon around the middle. It also breaks up the grey quite well. I've put a bow with a long tassel at the back fixed to the pink belt via two hooks and eyes. 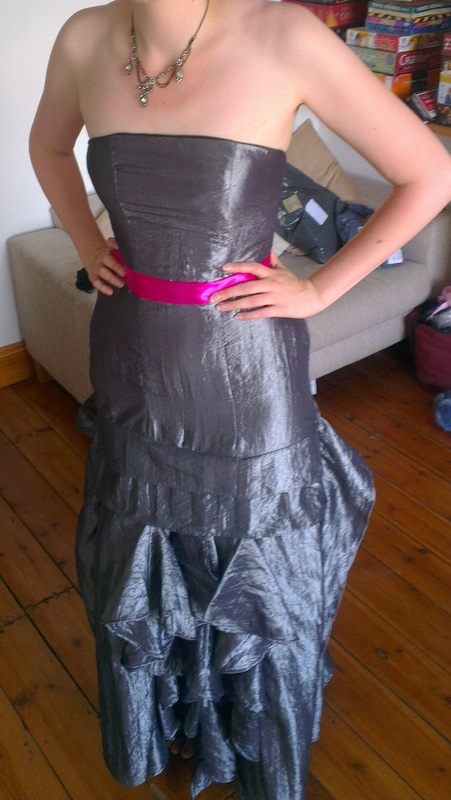
Overall, the flounces were a little fiddly and I got a lot of the fitting wrong first time. But it looks pretty awesome.Now I just need a black tie event to go to....
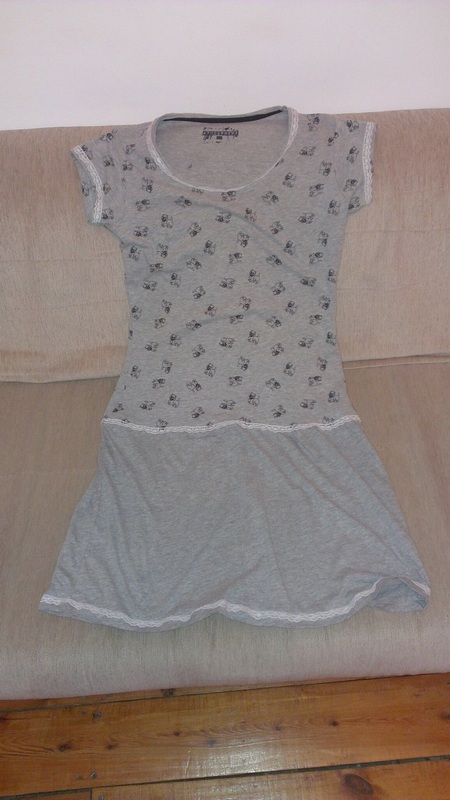 Sew Hipster! I saw instructions for this on a sewing blog.It's a very easy T Shirt dress. Take two t shirts, one large, one small. Cut the arms of the large and sew around the top in a large stitch to gather it. 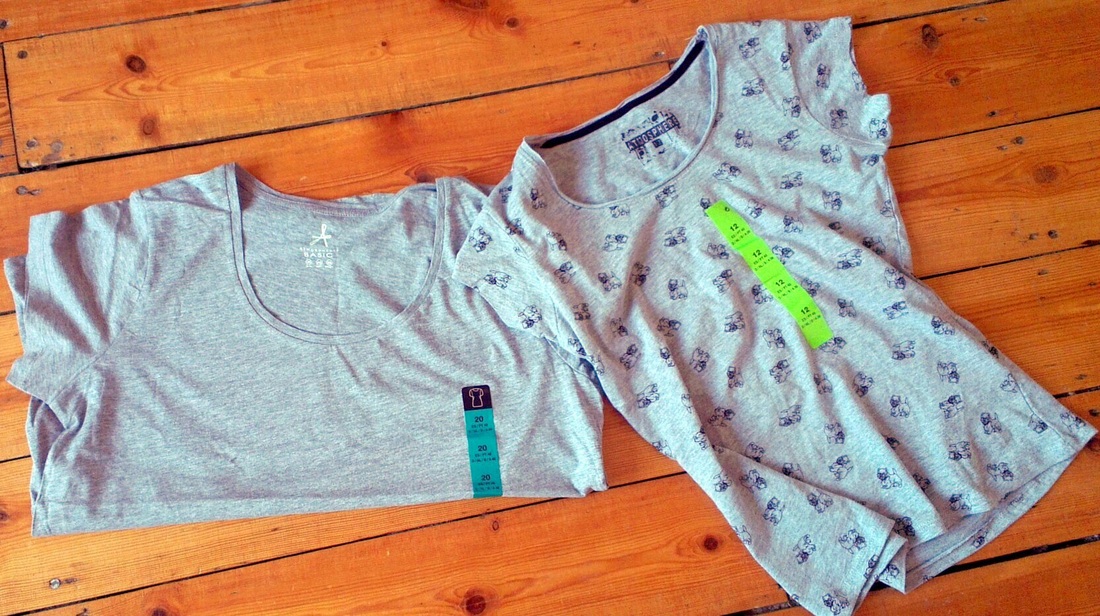 Primark's finest Then stitch it to the smaller t shirt with right sides together. You can make the bottom of the skirt more flouncy by using a man's XL size T-shirt and adjust its length to suit. If you would like a lower waistline use a longer t shirt. The size 20 wasn't that much larger so there wasn't too much of a flounce. Next time I'll look for a larger size.The small gathering was a little unflattering so I added lace to hide the seam. To tie it all in, I put lace around the collar and cuffs too.You could also add either flouncy or puffed sleeves by using the larger t shirt's sleeves and gathering at the top and bottom. Or pockets from the left over material. 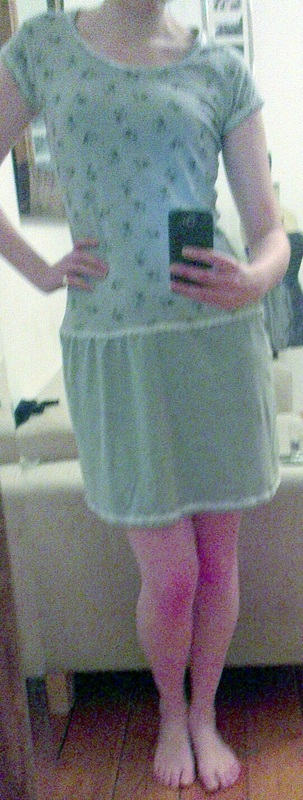 |
Apparently SewYou rip what you sew! Archives
May 2020
Categories
All
|
 RSS Feed
