|
I found this cake on Chow.com after googling 'Awesome Birthday Cake Recipe' and it does make an awesome cake. It's so delicious and chocolatey. Two layers of rich but fluffy chocolate cake separated by chocolate fudge filling and then covered in chocolate butter cream. Wow! I did this using cups but I think that American and English cup measurements might be different as everything was a lot darker than expected so I've translated them here. 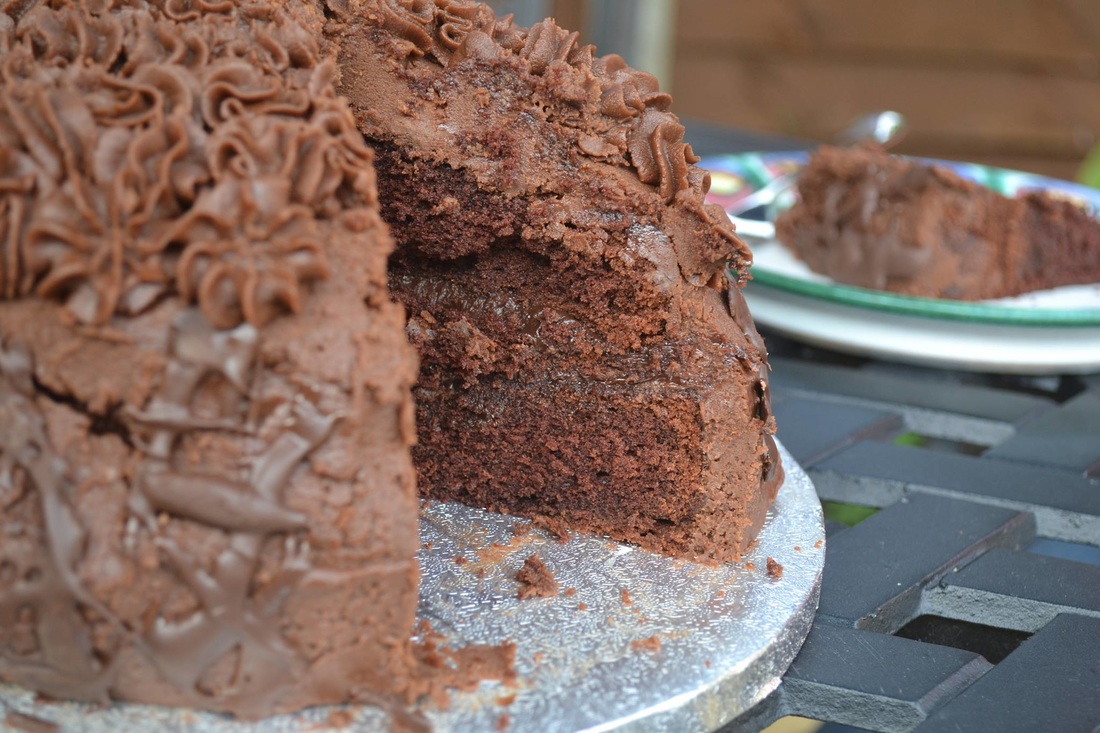 The Cake 245g plain flour 1 tea spoon baking powder 3/4 tea spoon salt 85g cocoa powder 150ml boiling water 150ml milk 6 oz butter 450g caster sugar 2 tea spoons vanilla essence 3 large eggs Pre heat the oven to 180 degrees and prepare two 8" cake tins. Mix flour, baking soda and salt and set aside. Then whisk together the boiling water and cocoa powder. Once it's combined, add the milk. Don't drink your hot chocolate mix. Beat the butter with an electric whisk until it is light and fluffy. Then cream in the vanilla and sugar. Add the eggs one and a time along with 1/3 of the dry mix. Separate into the two cake tins and cook for 30-40 mins. Leave to cool for a long time.  The Butter Cream 6 oz of chopped milk chocolate 3 oz of chopped dark chocolate 2 tablespoons milk 1 tea spoon vanilla extract A pinch of salt 350g icing sugar Heat up the chocolate in a bowl over a sauce pan until melted, stirring occasionally. Leave this to cool for a few minutes. Beat the butter with an electric whisk until light and fluffy. Add the milk and the pour in the chocolate. Finally add the vanilla and salt, mixing until fully incorporated. Slowly add the icing sugar a little at a time. Set aside to cool for an hour. The Fudge Filing 8 oz dark chocolate 170ml double cream 75ml golden syrup Whisk together the double cream and the syrup until completely combined and then bring them up to the boil in a small saucepan. Pour the hot mixture over the chocolate and stir until melted. Put in the fridge to cool for 45 mins to an hour. 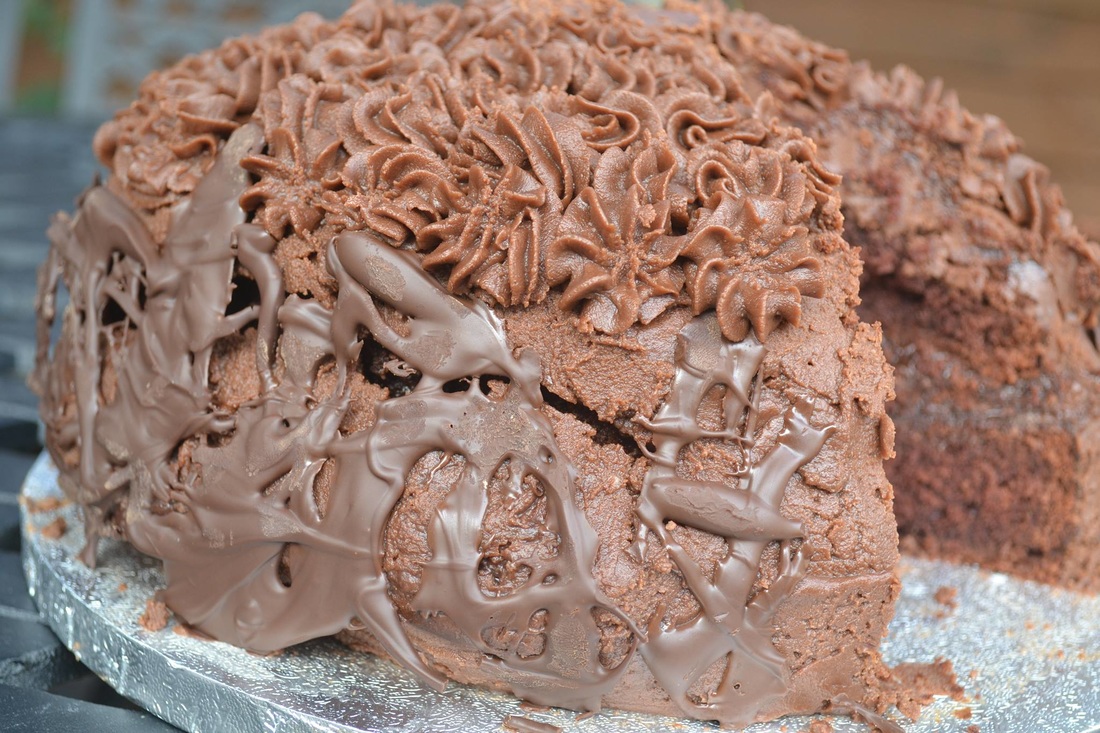 The Assembly Make sure the cake is completely cool and the fudge filling is very solid. You might need to whisk it a little before you spread it. Flatten the top of the cakes so that they will sit on top of each other without falling off using a bread knife. Spread the fudge filling onto the bottom layer and then place the top layer cake onto it. If it looks like it's going to slide you can put it in the fridge for a little while. Then lather in butter cream around the sides and on top. I recommend making swirling patterns, using a piper to make splodges or making a chocolate cage with any left over chocolate. 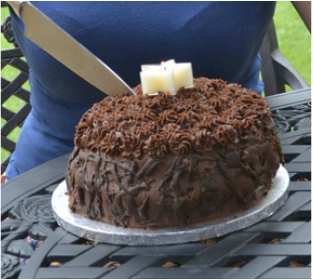
1 Comment
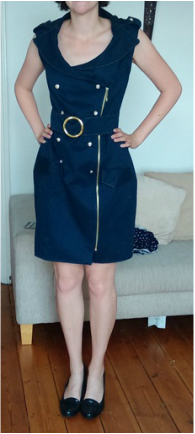 I saw a dress on Crafster that had been made using a pattern site called Lekala that makes custom print-out patterns. This seemed too good to be true so I thought I should test it. I found this awesome military dress on the site, put in my measurements and printed it. 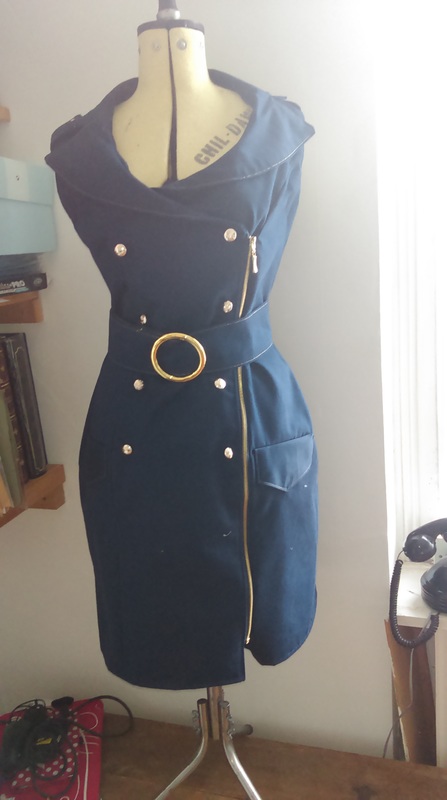 You have the option to pay $1 extra for seam allowances; as that was another 25% on the price I decided not to do that and that was not the correct decision: you already want to retrace the pattern once you've printed it and stuck it together adding seam allowances is a bit of a faff. 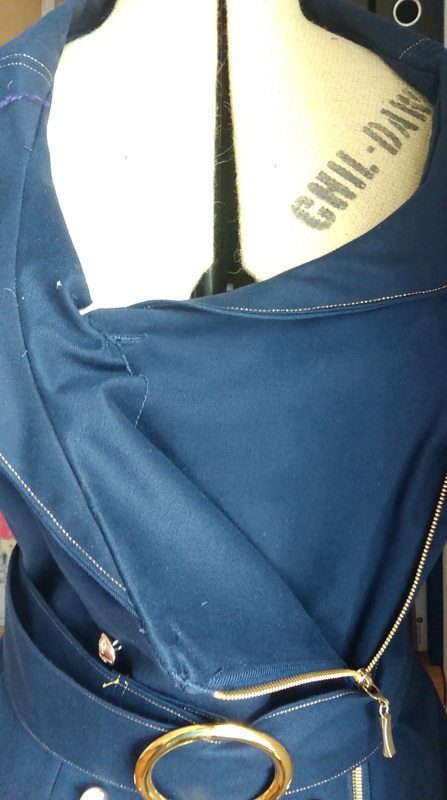 I was worried that the pattern wouldn't fit and while I was making it, it felt a little small; so I unpicked it and made the seams smaller only to have to put them all back in because it fit perfectly! I did have to take some of the seams in but only because I have a long waist and short body and I'd have to do that anyway. I'll certainly be using the site again so that I don't have to worry too much about editing pattern pieces! 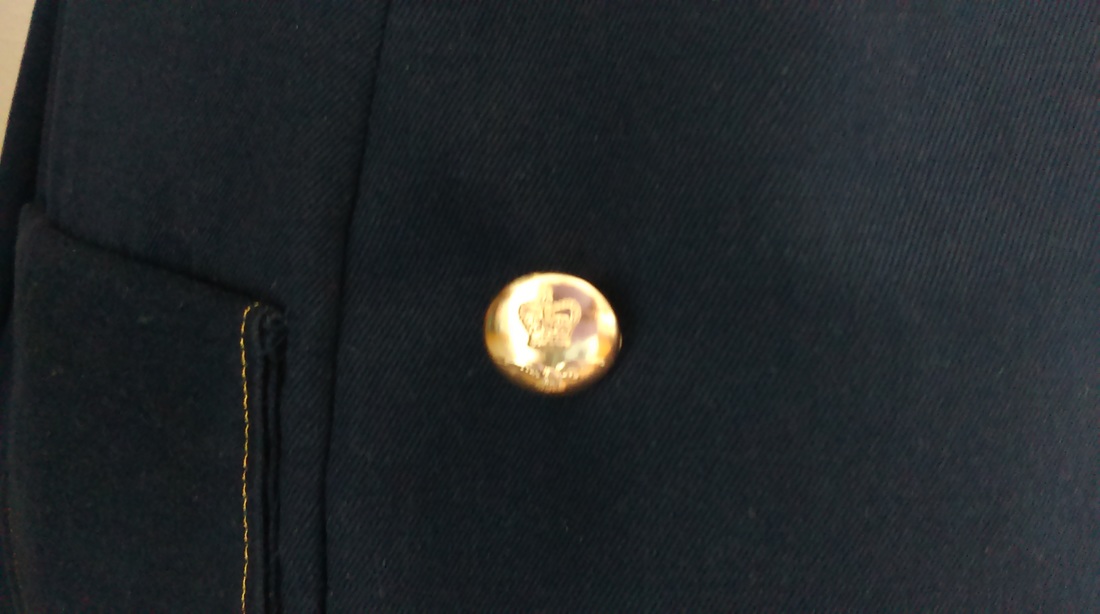 The dress is made from 3m of navy linen garbedine mix so it's quite thick and sturdy. It has a large lapel, a side zip, belt and 10 pretend buttons on the front. I decided to choose some RAF gold buttons but they do stick out a little so using flatter buttons might be better next time. 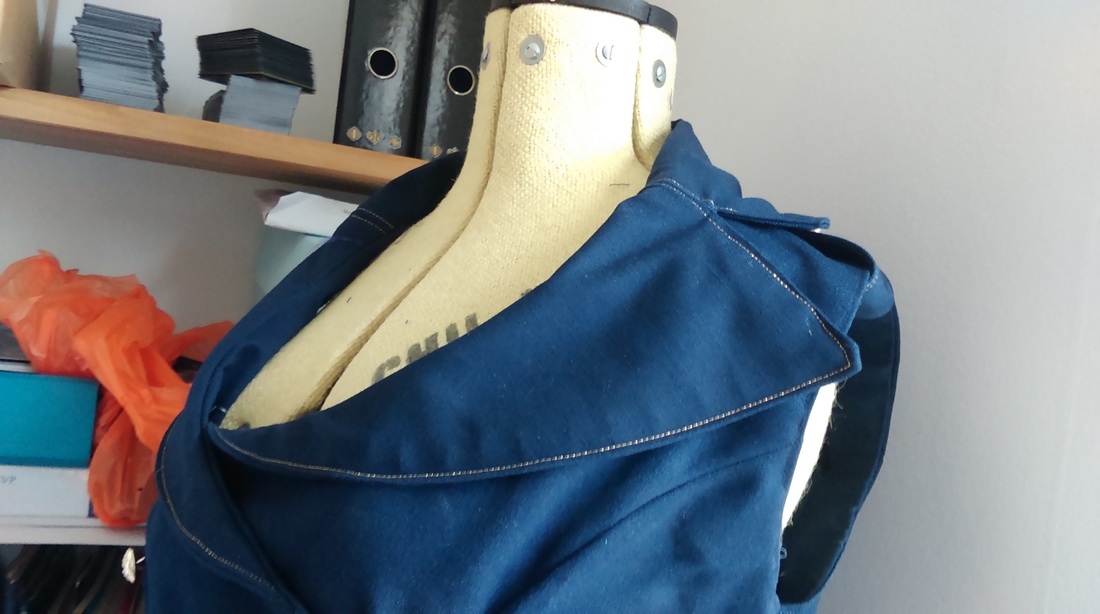 I was given a fantastic Christmas present of an assortment of exciting thread and buttons so I used some of it to edge stitch the lapels in gold and make them look a little more snazzy. 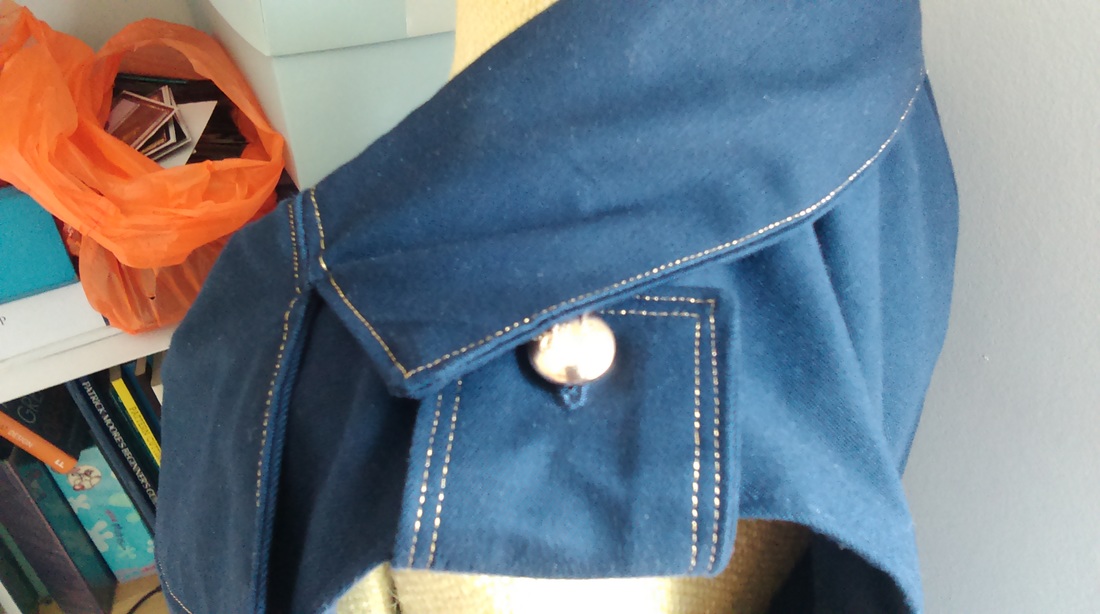 The epilets are also quite snazzy... 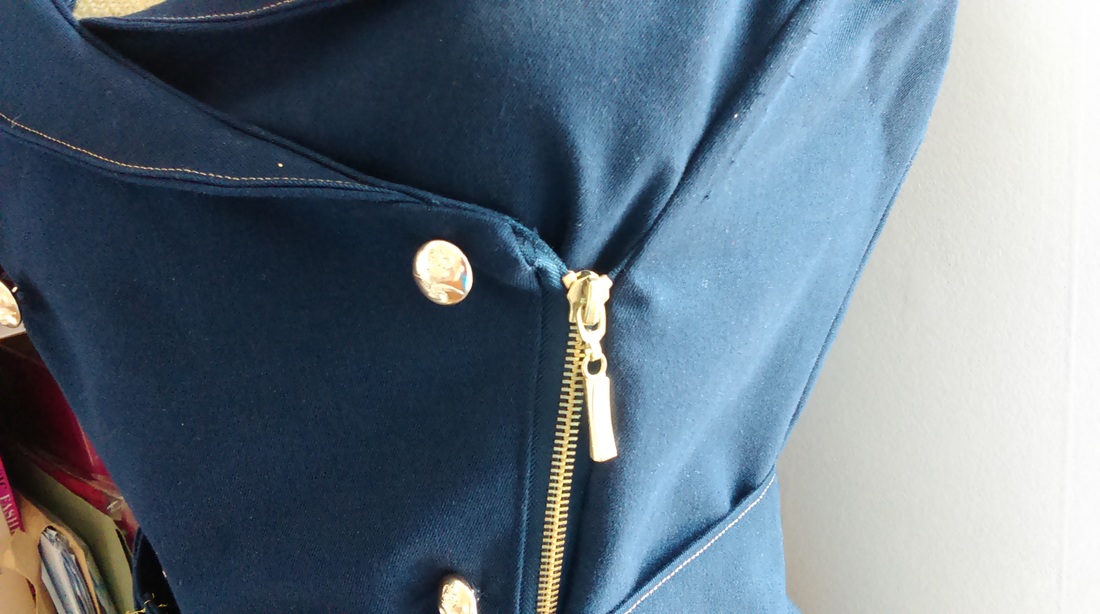 It's held together by a bright gold zipper and an inside button. I've added a couple of inches to the dress and to the facing so that it can be walked in without flapping open.
Overall, a good experiment! The site, in this statistically significant sample of one, produces patterns of the size required. The dress itself is smart and fun. 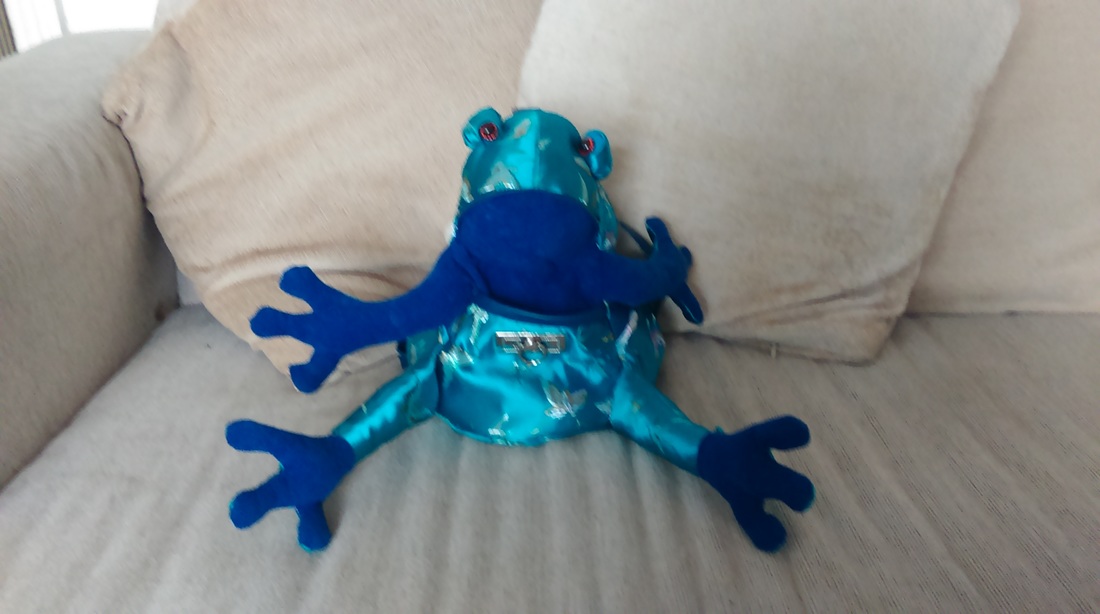 I tried this pattern last year when I made the owl bag but this frog is sew much better! 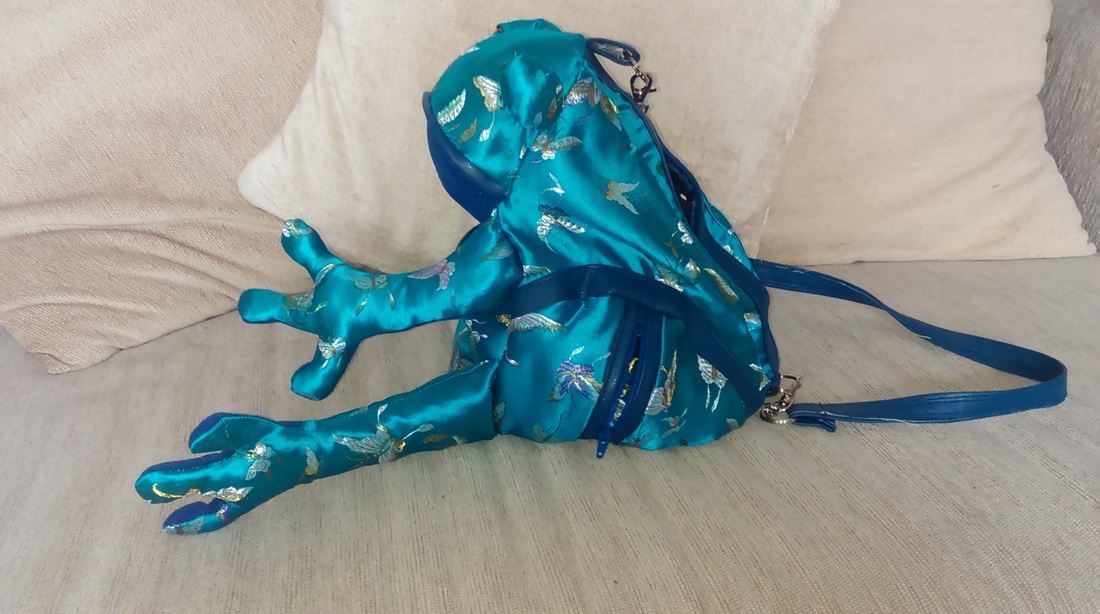 This is the prefect hand luggage. It's made from beautiful shiny turquoize butterfly fabric, royal blue suade and fake leather. 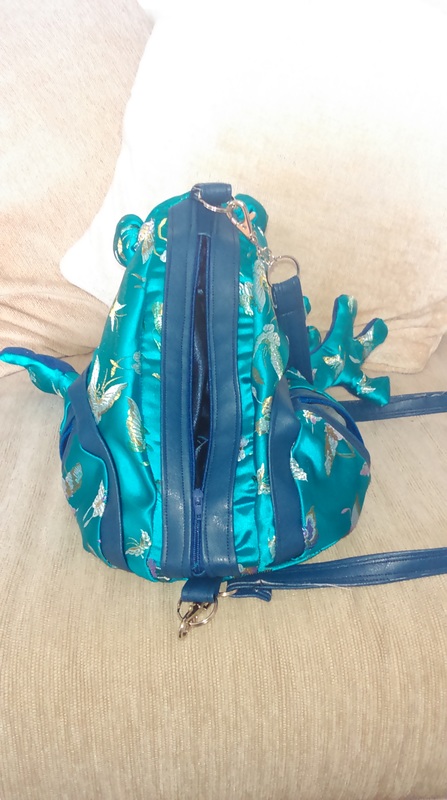 There are lots of pockets, one on each side about the right size or a small mobile or change and a larger pocket in the back, big enough for a passport but not, it turns out, an ipad. 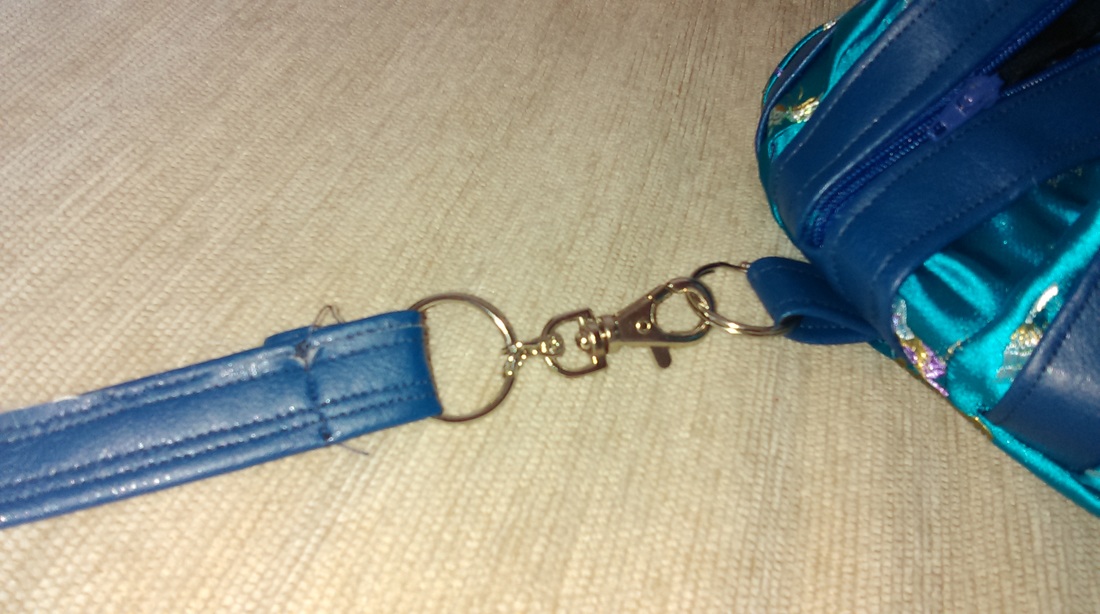 The strap is held on by a lobster clip. It's a single strap, long enough to go across the body. Sewing the leather was so much easier on the new sewing machine and using a number 16 needle.  There's a front pocket big enough for a wallet. 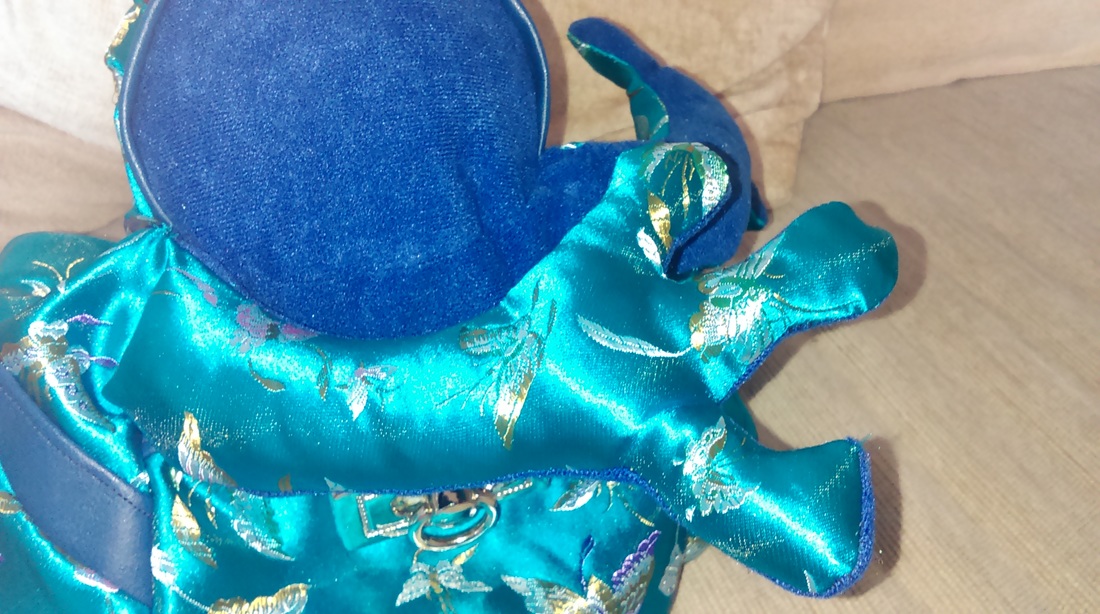 And really cute dangly arms! 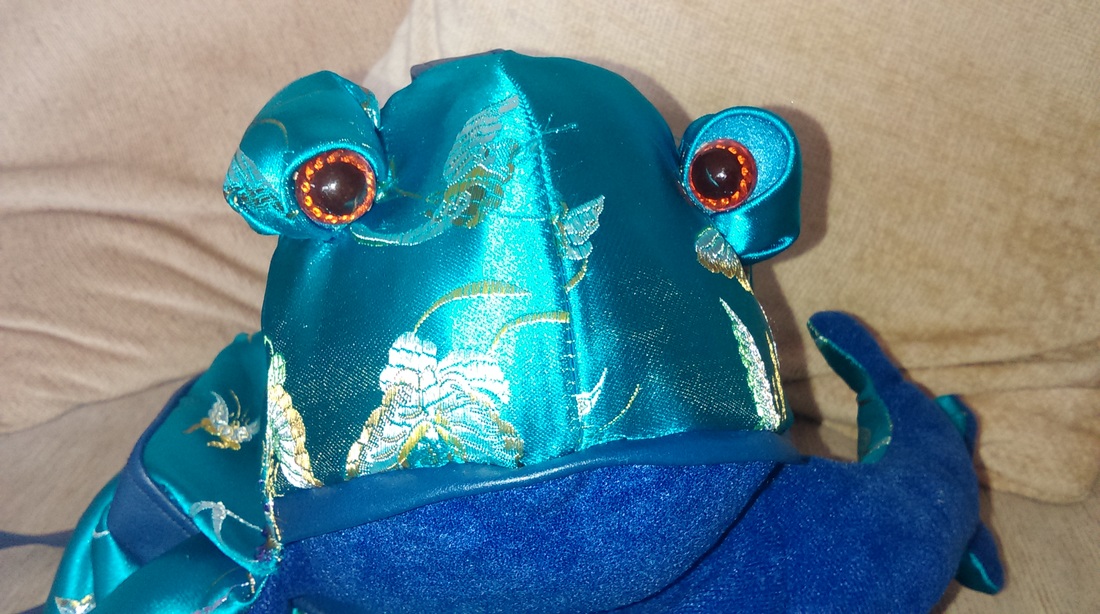 I love the leather mouth! A much more awesome alternative to a handbag and I'm sure Ernest's future aunts in law would agree!
Another delicious recipe from the Humming Bird Bakery Cookbook (thank you, Nadia). These went down a storm! 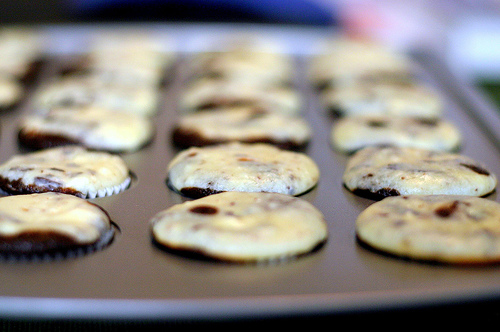 What surprised me about the sponge is that it didn't have any eggs in it. It's quite a dense mixture made by mixing wet and dry ingredients like a muffin:
190g Flour 120g Caster Sugar 40g Cocoa Powder 1/2 tsp Baking Powder 40ml Oil 1/1/2 tsp white vinegar (i used cider vinegar and it was fine!) 1 cap Vanilla Essence Put all these into the cupcake cases and then mix together the cheese cake: 140g cream cheese 60g caster sugar 1 egg 1 cap vanilla essence 100g milk chocolate chips Pop this on top of the cupcakes and cook at 170 degrees for 20 mins. The recipe book suggests adding cream cheese frosting on top of these but I think that's a bit much! If you were going to add frosting then I'd suggests a chocolate fudge icing. 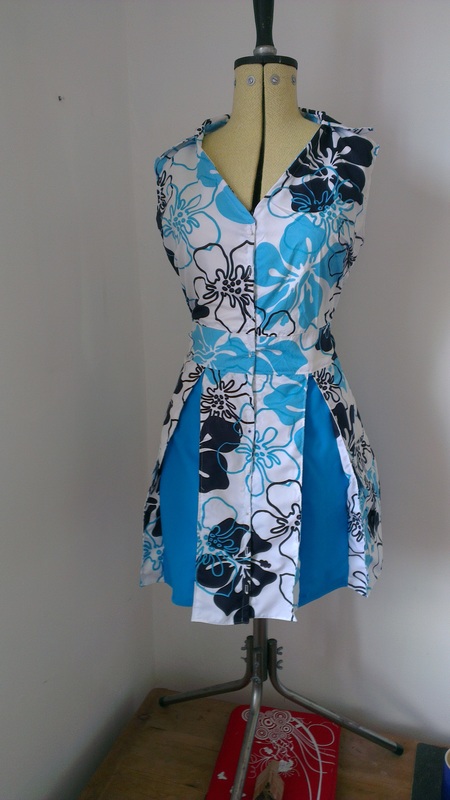 I'm not a fan of swimming costumes but I really like the Edwardian swimming dresses. The only problem with them is that they are made of linen and so are quite heavy when wet and don't dry quickly. So I decided to make a swimming dress from board short material. 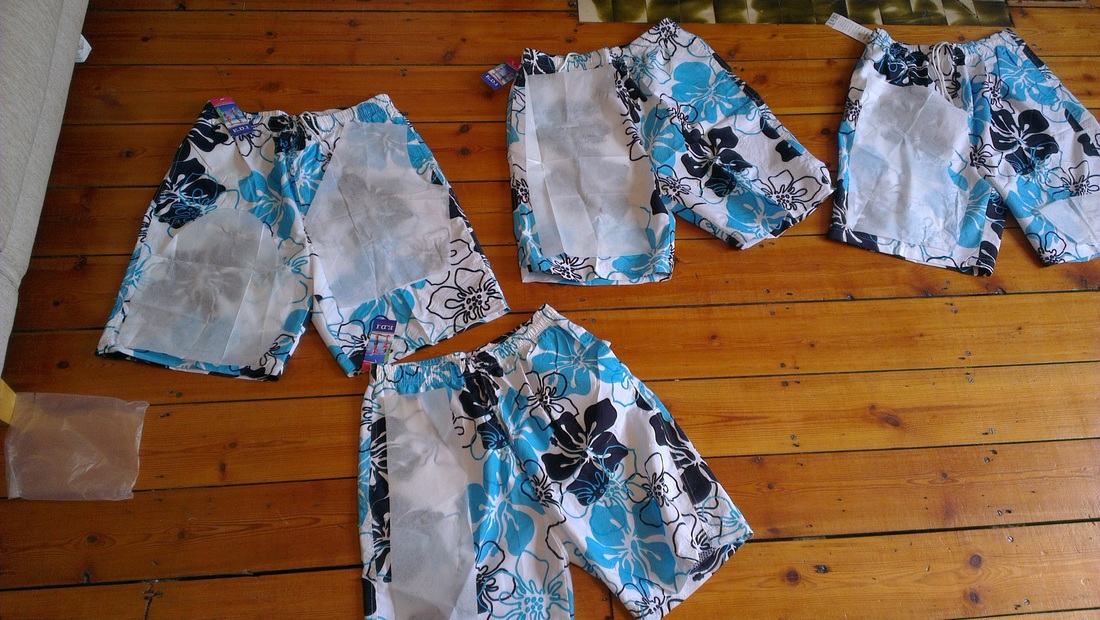 Unfortunately, I couldn't find the material for sale in the UK so I bought four pairs of extra large board shorts and cut them up. I was hoping to get an Enchanted-style holey curtain shot but there wasn't any material left by the time I'd finished! 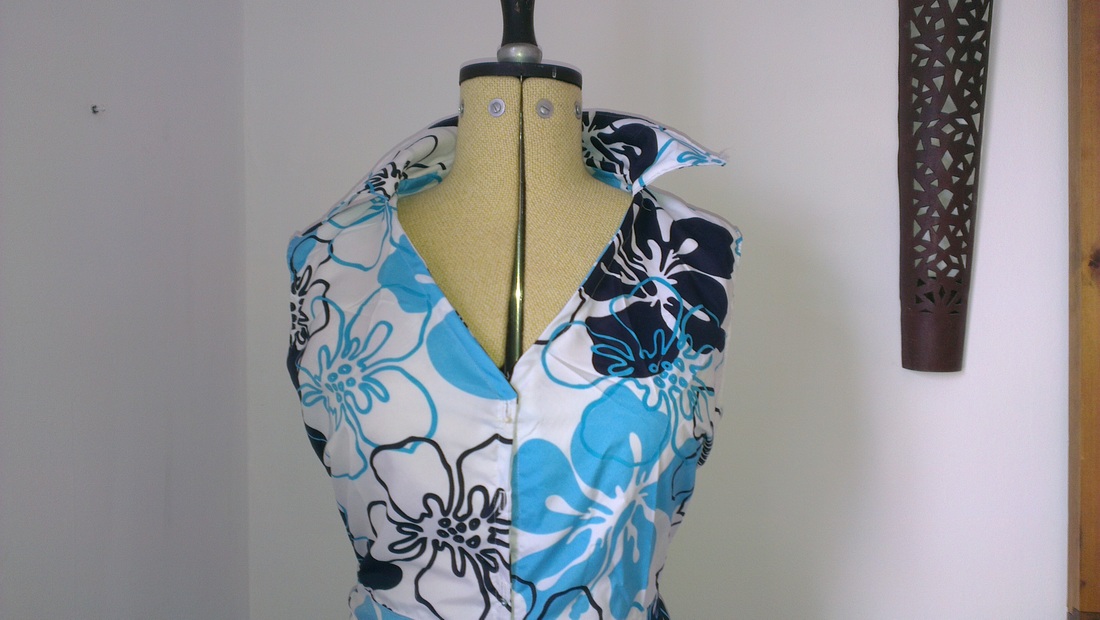 I used the top of linen dress and a pleated netball skirt to cut a basic pattern in tissue paper and then adjusted it on my mannequin. It turns out Miranda, the mannequin, has a much shorter body than me so I had to make a belt strip in the middle to join the two together. 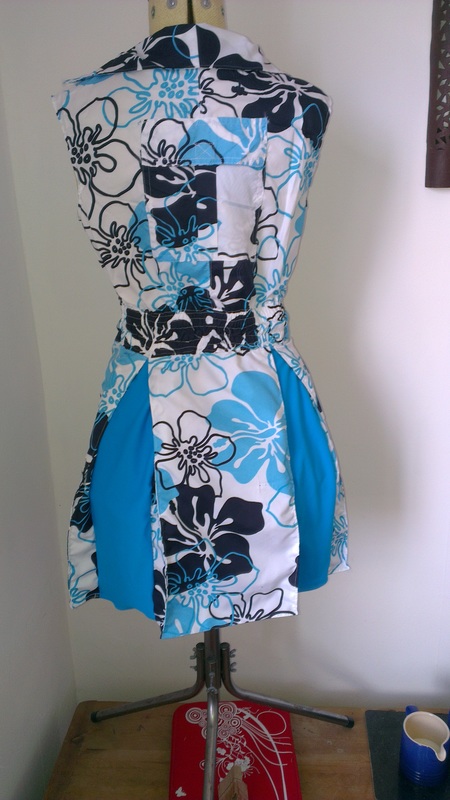 Despite using all the material, the skirt was a little tight around the bottom... of the skirt and so wouldn't have been good for swimming as I wouldn't be able to kick. I cut open the pleats and inserted a strip of aqua lycra which would stretch with the kicks. I plan to make a matching bikini out of the lycra to wear under the dress. 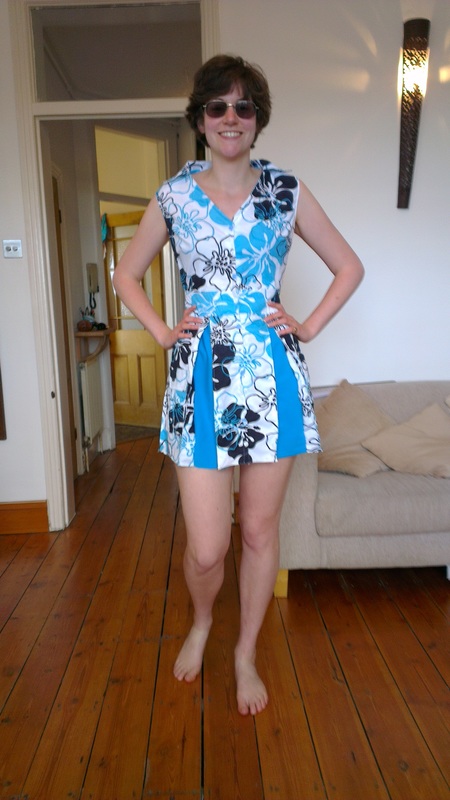 Throughout the construction of the garment, I tried to keep it in theme with the boardshorts it came from: all the seams are top stitched with twin needles and the hem of the skirt and arm holes is a double hem. I put pockets on the sides to make it look more like a pair of swimming trunks but I also found that the trunks were pretty badly made and every time I unpicked a pocket, there was a giant hole made when the sewing machine had finished the stitches. I mostly managed to hide these holes in the new seams but there was one massive hole in the centre of the back so I stuck a pocket over the top. I'm going to call it theme-ing. I made the middle band more like the waist band of a pair of swimming shorts by unpicking the elastic from two truncks and making a double band at the back. It's sheared over the top of the elastic. I took out all of the darts in the top once I added the elastic and this will give a bit more space when swimming. 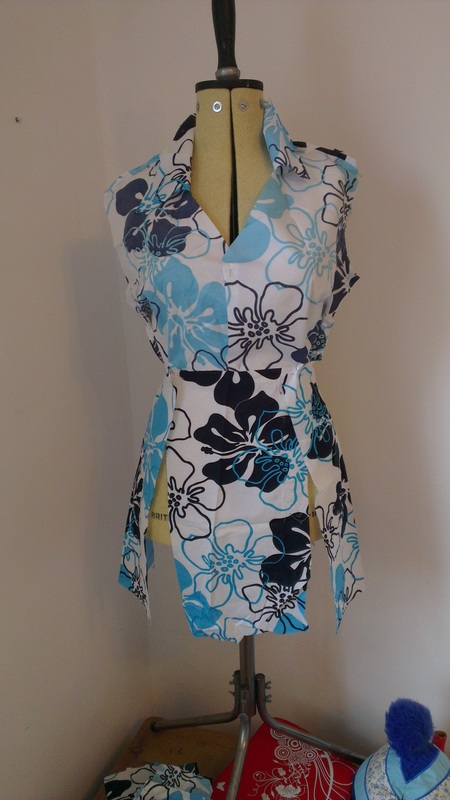 I was going to put in sleeves but I decided that would hinder the arm movements too much. I was also planning for the collar to be larger but I think that too could get in the way of turning your head to breathe. 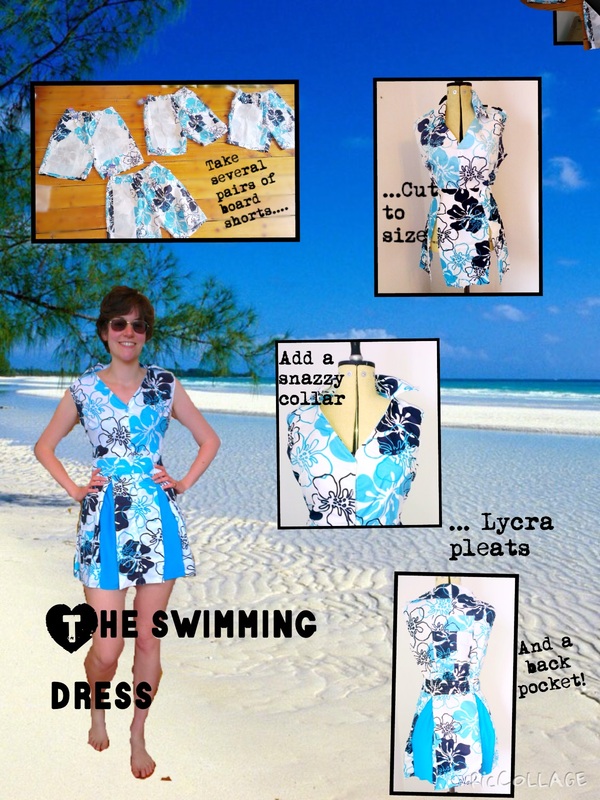 All in all, I'm looking forward to hitting the beach this summer in my new outfit!
|
Apparently SewYou rip what you sew! Archives
May 2020
Categories
All
|
 RSS Feed
